

To open the AI Assistant settings, go to your WordPress admin menu:
TrackShip → Settings → AI Assistant (tab in the header) → TrackShip MCP (left sidebar).
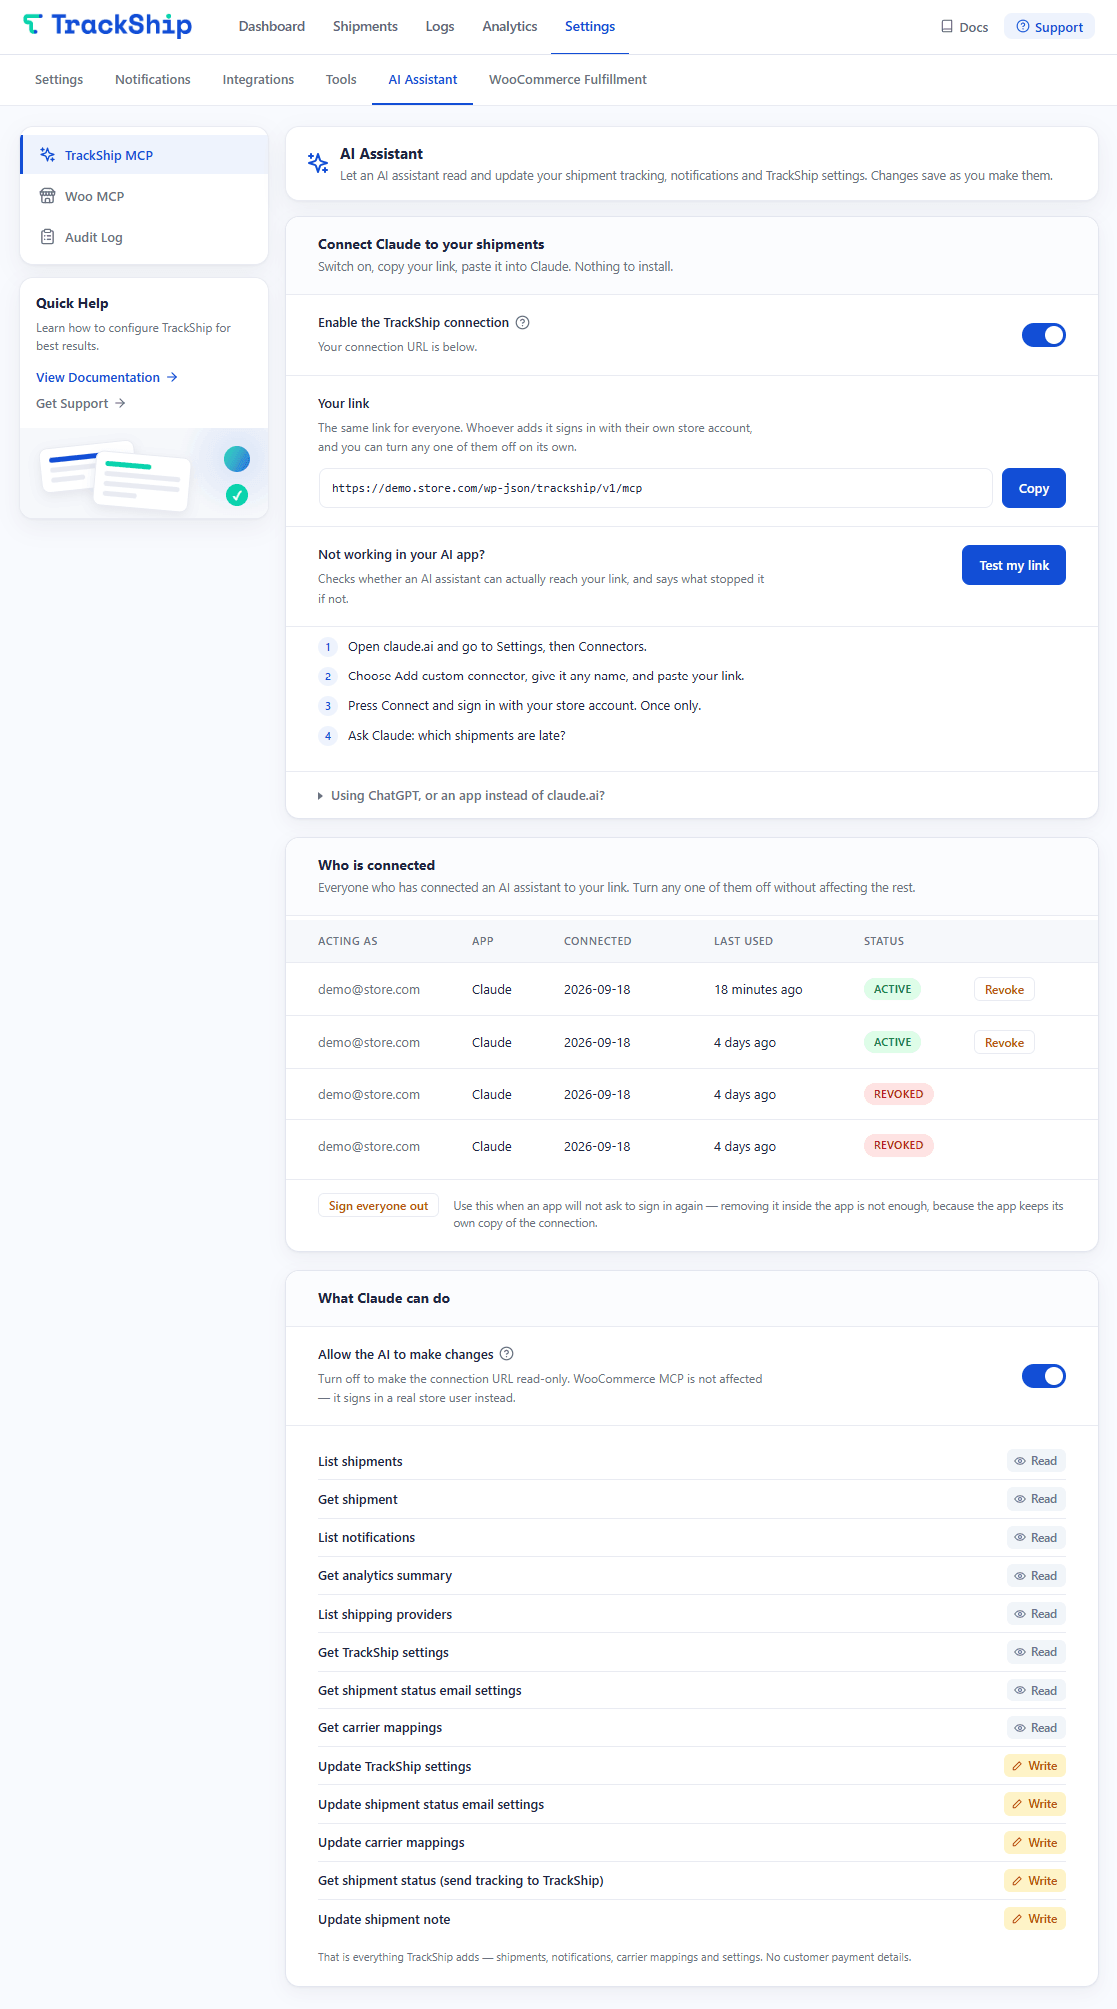
Enable the TrackShip connection
The Enable the TrackShip connection toggle is the master switch. When off, the endpoint is closed and no AI can connect — the address does not exist at all. When on, Your link appears below the toggle: this is the URL you paste into your AI assistant’s connector settings.
The same link works for everyone on your team. Whoever adds it signs in with their own store account during the sign-in flow, and you can revoke any one connection individually from the Who is connected table.
Your link contains no password. It is an address, not a credential: anyone who has it can start the sign-in flow, but they can only connect if they can sign in with a store account that is allowed to manage the store. To cut off everyone at once, use Sign everyone out, or switch the connection off.
Connecting your AI assistant
For step-by-step instructions for Claude, ChatGPT, Claude Desktop and Cursor, see Connect Your AI Assistant.
Test my link
Use the Test my link button to check whether your link is reachable from outside your store. Possible results:
- Reachable — the endpoint is live and answering correctly.
- Blocked — a security plugin, firewall or CDN is refusing the request, often because AI services call from libraries named on bad-bot lists. The test names the plugin where it can, and offers Fix this for me to let TrackShip’s addresses through. See Troubleshooting.
- Unreachable — the store could not call its own link. That is a networking problem on the server, not your link and not your AI assistant.
- The connection is switched off — turn on Enable the TrackShip connection first.
A pass proves the link works. It does not prove an outside service can reach it, because the test request usually never leaves the server — so the result also reports what has actually arrived from AI apps.
Who is connected
The Who is connected table lists every AI assistant that has connected to your link. Each row shows:
- Acting as — the store account the assistant signed in with.
- App — the AI client used (for example, Claude or Cursor).
- Connected — the date the assistant first connected.
- Last used — how long ago it last made a request.
- Status — Active or Revoked. Press Revoke on any active row to cut off that assistant immediately, without affecting anyone else.
The Sign everyone out button revokes all active connections at once. Use it when an app will not ask to sign in again — removing the connector inside the app is not enough, because the app keeps its own copy of the token. Your link does not change.
TrackShip tools on this connection
The lower section lists every tool available on this route, each with a Read or Write badge. See What the AI Can Do (Tools) for the full reference.
- Allow the AI to make changes — on by default. Turn it off to make the connection read-only: the write tools disappear from the AI’s list entirely, so it can look up shipments and notifications but not change settings, mappings or notes, and not resync tracking. The WooCommerce MCP route is not affected by this toggle — it signs in a real store user instead.
Settings save automatically
Toggles on this screen save as soon as you switch them — there is no Save button. If an AI assistant reports a connection error after you have made changes, confirm the Enable the TrackShip connection toggle is on, then check the Audit Log for error details.