
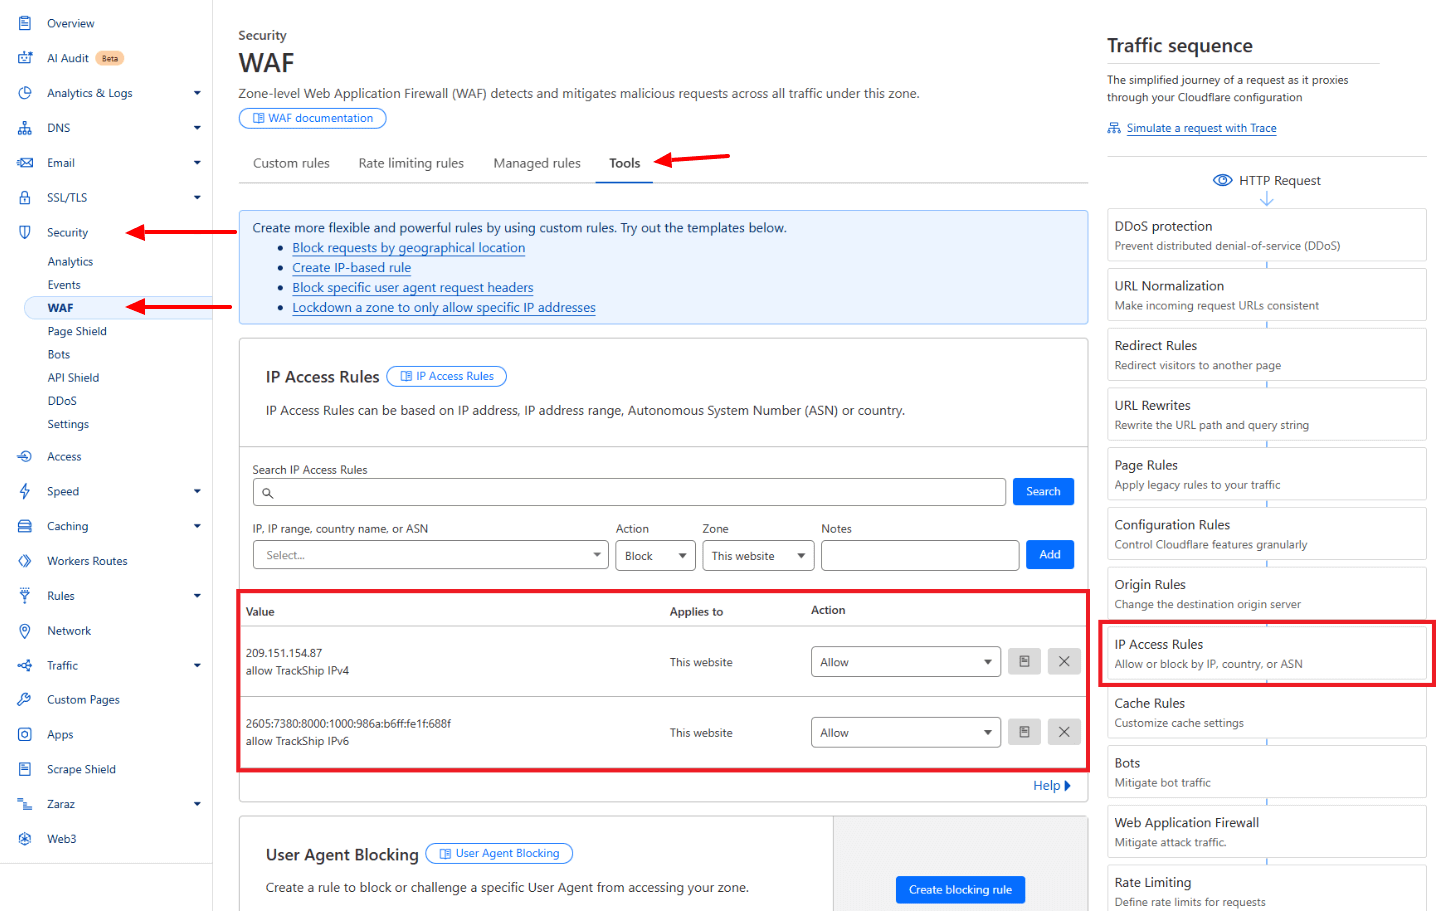
If your TrackShip requests are being blocked by Cloudflare’s Web Application Firewall (WAF), you need to whitelist TrackShip’s IP addresses to ensure uninterrupted tracking updates. Follow the steps below to create a custom rule that allows TrackShip’s IPs.
Method 1: Using IP Access Rules
- Log in to your Cloudflare account.
- Navigate to Security > WAF in the left sidebar.
- Click on IP Access Rules.
- In the Search IP Access Rules section, enter the first TrackShip IP address.
- Choose Allow from the action dropdown.
- Set the scope to All websites in account.
- Click Add to save the rule.
- Repeat the process for the second TrackShip IP address.
TrackShip IPs to Whitelist:
2605:7380:8000:1000:986a:b6ff:fe1f:688f209.151.154.87
Method 2: Using WAF Custom Rules
- Log in to your Cloudflare account.
- Navigate to Security > WAF in the left sidebar.
- Click on Custom rules.
- Click on Create Rule and give it a descriptive name (e.g., “TrackShip IP”).
- Under Field, select IP Source Address.
- Set the Operator to equals and enter TrackShip IP address.
- In the Then take action section, choose Skip to exclude these IPs from security blocks.
- Save the rule.
Example Rule Expression
If you are manually entering the expression, it should look like this:
(ip.src eq 2605:7380:8000:1000:986a:b6ff:fe1f:688f)This rule ensures that TrackShip’s IPs are always allowed through without being blocked by Cloudflare’s WAF.
TrackShip IPs to Whitelist:
2605:7380:8000:1000:986a:b6ff:fe1f:688f
