

Once the AI Assistant is enabled, connect an AI assistant using your link. The sign-in and approval happen automatically through OAuth 2.1 with PKCE — there is no API key to copy by hand. The connecting user must be able to manage the store (Administrator or Shop manager role).
Step 1 — Copy your link
In TrackShip → Settings → AI Assistant → TrackShip MCP, press Copy next to Your link. It looks like this:
https://your-store.com/wp-json/trackship/v1/mcpStep 2 — Add it as a connector
Claude (claude.ai — browser and mobile)
- Open claude.ai and go to Settings → Connectors.
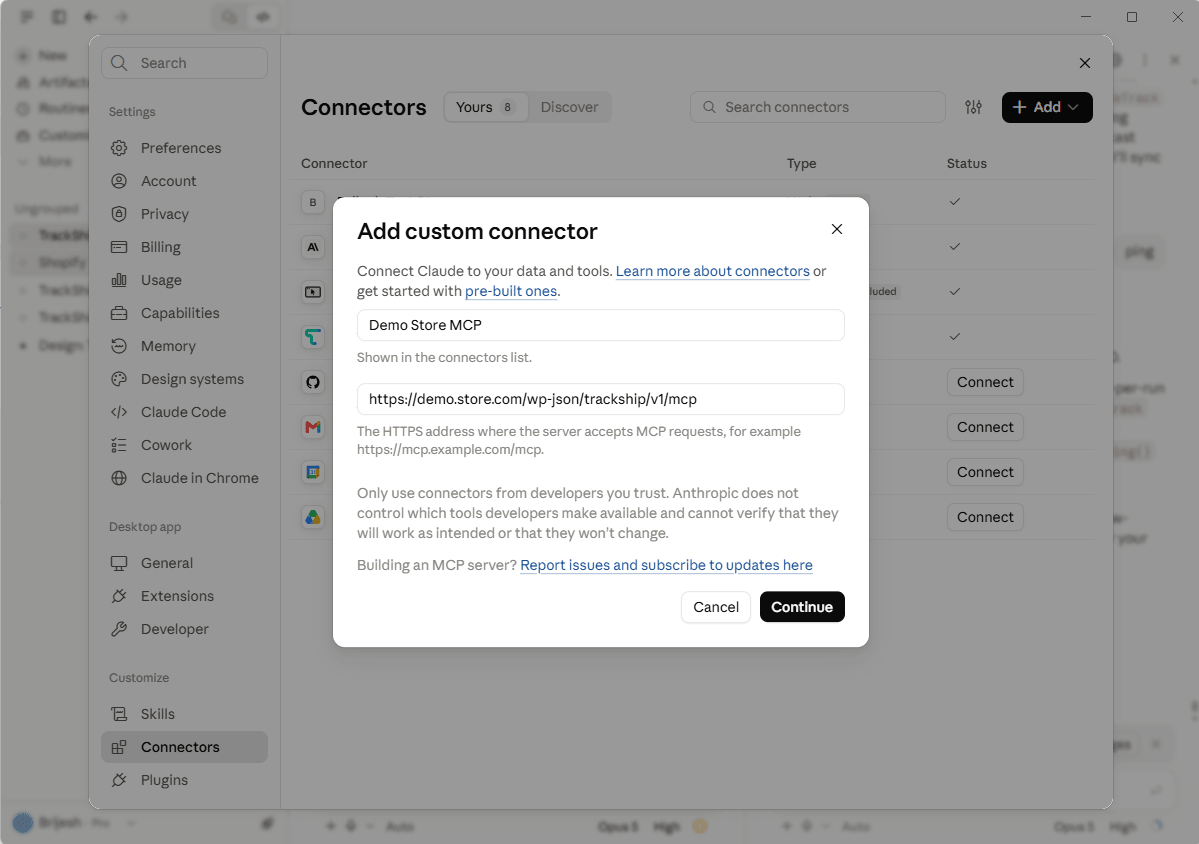
- Click Add custom connector.
- Give it a name (for example, TrackShip) and paste your link into the address field.
- Click Add. Claude checks the server, then opens your store’s sign-in page.
- Sign in with your normal store account and press Connect to approve access. You are returned to Claude with the connector active.
- Confirm it worked: ask Claude “Which shipments are late?” — it should return results from your store.

ChatGPT
In ChatGPT, turn on Developer mode in settings, then go to Settings → Connectors and paste the same link. The sign-in and approval flow is identical to Claude. Custom connectors require a ChatGPT plan that supports them.
Claude Desktop and Cursor
Both can use this link too. In Claude Desktop, go to Settings → Connectors → Add custom connector and paste it. For Cursor, press Add to Cursor in the “Using ChatGPT, or an app instead of claude.ai?” section of the AI Assistant screen. Neither needs a WooCommerce key or any software installed.
Step 3 — Start chatting
You can now say things like:
- “Which shipments are late?”
- “Show me the tracking history for order #1234.”
- “How many shipments were delivered last week, and what was the delivered rate?”
- “Which shipment emails failed to send this month?”
The assistant acts as your store account and can only do what that account can do. Every action is recorded in the Audit Log.
Disconnecting or revoking access
To disconnect one AI assistant, go to AI Assistant → TrackShip MCP → Who is connected and press Revoke on that row. Its token stops working immediately, and everyone else is unaffected. Removing the connector inside the AI app is not enough on its own — revoke it here too.
To disconnect everyone at once, press Sign everyone out. Your link does not change; each person simply signs in again the next time their app calls.
Troubleshooting
If the connection fails at Step 2, see Troubleshooting the AI Assistant — the most common causes are the toggle being off, a security plugin blocking the REST API, or another plugin answering the sign-in address.