

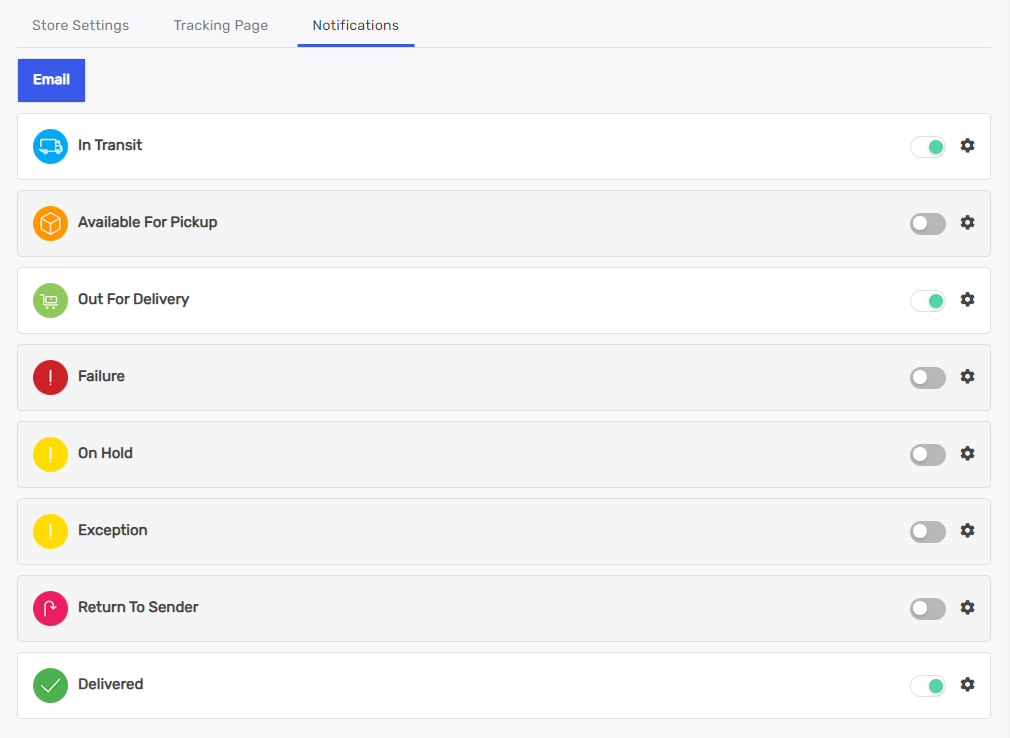
Shipment emails are automatically triggered based on the shipment status. You can choose which shipment statuses prompt email notifications and customize the content and appearance using the email customizer, which includes a live preview feature.
To enable and personalize your shipment status email notifications, go to TrackShip Dashboard > Store > Settings > Notifications, then access the Notifications tab where you can customize the email for shipment status..
Please Note: Emails are sent to the email address used during shipment creation.
Sender Email
TrackShip allows you to send shipment notification emails to your customers using one of two methods
TrackShip Email
TrackShip Email lets you send emails directly from your own domain address (e.g., [email protected]) through TrackShip’s managed infrastructure. No external email service account is needed you only need access to your domain’s DNS settings to complete a one-time verification

- Go to TrackShip Store → Settings → Sender Email Address and select the TrackShip Email tab.
- Enter your store email address (e.g., [email protected]) in the Email Address field and click Add.
- Switch the ON/OFF toggle to ON to activate TrackShip Email as your sender method.
- Click “Verify your domain” to expand the DNS verification panel.
- Log in to your domain registrar and add the three DNS records provided: DKIM and DMARC.
- Return to TrackShip and click Verify each record will show a green checkmark once detected.
- All three records must be verified before emails can be sent. DNS changes may take up to 48 hours to propagate.
SendGrid Email
SendGrid Email connects TrackShip to your own Twilio SendGrid account, giving you full control over email delivery, custom branding, and Dynamic Templates. This is ideal for stores that already use SendGrid or need advanced email customisation.
- Go to TrackShip Store → Settings → Sender Email Address and select the SendGrid Email tab.
- Enter your SendGrid API Key (starts with
SG.) found in SendGrid under Settings → API Keys. - Enter your Dynamic Template ID (starts with
d-) found in SendGrid under Email API → Dynamic Templates. - Enter the Sender Email Address you have verified in your SendGrid account as a Sender Identity.
- Click Save TrackShip will validate your credentials and activate SendGrid as your sender method.
Email Customizer
With TrackShip’s Email Customizer, you can easily customize your email notifications. Email customizer offers three customizable sections Email Content, Email Design, and Email Footer. Email customizer allowing you to personalize your emails to match your brand and suit your customers’ preferences.
1. Email Content
In the Email Content section, customize the Email Subject for clarity and attention-grabbing. Craft engaging messages in the Email Content field to effectively convey your message. Personalize both the subject line and email body for effective communication with your customers.
2. Email Design
In the Email Design section, customize the visual aspects of your email notifications. Choose a Background Color that suits your brand’s style. Define the Border Color to add structure. Select a Font Color for readability. Customize Button Color to attract attention, and Button Font Color for clarity.
3. Email Footer
In the Email Footer section, you can choose to remove the “Powered by TrackShip” option. This option ensures a seamless branding experience for your email notifications.